Project: Engine Removal
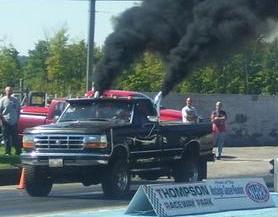
Engine Removal: The Real How-To: I was so moved by the whole experience that I wrote an article for those contemplating a PSD removal. 1) Soak every nut and bolt you think will have to come out with your favorite loose juice; PB Blaster, WD-40, or whatever. 1b) Stop by local repair shop that re-charges air conditioning, and have them drain the a/c system as your first step. 2) Have lengthy conversation with local repair shop guy on why you want the system drained and not recharged. 3) Receive blessings from all the mechanics at the local shop when they hear you're going to pull the Power Stroke from your pickup. 4) Stop by the corner Mart and stock up on beer. 5) Back at home, drain engine oil and remove filter. (The reason for pulling the engine is to replace a rotten oil pan, so might as well do it now.) 6) Try to figure out why there's not a drain plug on the bottom of such a big oil filter. 7) Rig up a contraption with a hose and bucket, then drain the cooling system from the plastic petcock at the lower left side of the radiator. 8) Fumble around for the garden hose to wash the coolant out of your eyes since the petcock came completely off, allowing massive stream to freely flow from the radiator, missing the bucket, but not your face. 9) Drink a couple of beers to wash down the coolant that got in your mouth. 10) Go get more old towels, because, so far, you know you're going to need them. 11) Remove the air box lid and air filter, and all related ducting all the way to the turbo. 12) Disconnect both batteries and remove them. (Removal of air box lid, filter, and batteries gives lots of space to pile your wrenches, so you don't have to climb up and down so much. Refer to incident, #53) 13) Stand back and drink another beer while you gaze at all the stuff that needs to be unbolted from the engine. 14) Remove the serpentine belt. 15) Disconnect wires and remove the Alternator-3 bolts. 16) Remove the Alt. bracket from the block-4 bolts. 17) Remove the hose 'union block' from the back side of the air conditioner compressor-1 bolt. 18) Cuss violently as you strike your head on the underside of the hood; Apparently draining the a/c system means removing the refrigerant and does not include depressurizing the system. 19) Put the little a/c o-rings in a safe place to match for replacements later. 20) Give your neighbor a beer for helping you to remove the hood. Do this now, it's just safer. 21) Remove the a/c compressor-4 bolts. 22) Get your hose and bucket contraption to catch power steering fluid, then remove hose from underside of power steering pump and quickly slip on drain hose. 23) Unbolt the other line from the p/s pump when fluid stops draining. 24) Remove the a/c & p/s pump bracket, with p/s pump attached, from block-4 bolts. 25) Recall incident with the coolant from earlier and carefully remove the large radiator hose from bottom of radiator, then remove the smaller hose. (Actually, at 60k miles, proceed to remove all hoses as they should be replaced anyway.) 26) Grab some of those towels and clean up the floor and truck frame. 27) Drink another beer for the hell of it. Note: 28) - 30) applies to trucks with automatic transmissions: 28) Cut 2 small pieces of hose, that match the size of the tranny coolant lines going into the bottom of the radiator, and shove a bolt in one end of each making a plug, then grab two more bolts. 29) Carefully and quickly remove the hoses from the bottom of the radiator, slip a bolt into the lines on the truck, and the small hose 'plugs' onto the radiator to prevent fluid leakage. 30) Go find some larger diameter bolts as those were too loose and fell out, allowing fluid to puddle on the floor. 31) After cleaning up the tranny fluid, unbolt the fan shroud, one small bolt in each top corner, lift slightly, and slide back over fan. 32) Unbolt the radiator by removing the three bolts in each upper corner, then remove the up-side down 'L' brackets. 33) Carefully lift the radiator straight up out of the truck and set it aside a great distance from where you are working to protect it from damage. 34) Lunchtime: Yell to the Woman for some samiches and wash'em down with a couple of cold ones. 35) Get/obtain/rent/borrow or make a wrench out of some flat steel stock to fit the nut between the fan and pulley. With a large set of channel locks grab the pulley bolt heads and unscrew the fan assembly with the wrench on the fan nut. 36) Ponder why it won't come off, then remember to turn it counter-clockwise, (that's 'anti-clockwise' for our English friends), as clearly stated by the bright yellow sticker on the fan shroud. Remove it and set it aside. 37) Remove the ground strap and small bracket assembly on the lower right of the engine, and unscrew the nut on the solenoid on the right inner fender to free-up the double green wires coming from the engine harness, and lay the wires across the engine out of the way. 38) Drink another beer as you stare at the pile of parts sitting on the work bench that used to be in your truck. 39) Drink another beer as you just realized the parts that used to be in your truck are now sitting on the work bench. 40) Get some more beer from the corner Mart while you're getting more Kerosene because you picked the coldest frickin day of the year to do this and the torpedo heater just ran out. 41) After an hour of trying to figure out how to remove the turbo, search the internet for turbo removal posts. 42) After an hour of fighting with the damn computer, create a new post asking how to remove the turbo and call it a day. 43) Sleep in. It's Sunday. 44) Head to Sears (thank God for Sunday hours) for some tools after receiving much good advice from fellow internet PSD addicts. Pick up a 15mm stubby box wrench and a 1/4" universal joint that you swear you had but now can't find. 45) Stop at another store on your way home because you forgot to get a small inspection mirror, and pay $5 for it because you can't find the one you paid $.50 for at a swap meet. 46) Loosen the hose clamps and remove the intake 'Y' tube in front of the turbo. Keep track of the orange gasket that goes in between the turbo and pipe. 47) Recalling a project from your younger days involving a lost socket and subsequent engine tear-down, stuff clean rags in the intake holes on the engine. 48) Place 15mm stubby box wrench on the bottom turbo exhaust nuts and tap with a hammer to break them free. Remove the nuts with the stubby wrench, small turns at a time. 49) Remove the top 13mm bolts on the exhaust turbo inlet. 50) Attempt removal of rear pedestal bolts with 10mm 1/4" drive socket with a swivel joint and extension. 51) After wrenching on the first rear bolt, set the broken socket aside for replacement, visit the first-aid kit, go find your leather gloves, and get another 10mm 1/4" drive socket from another tool set. 52) Loosen the passenger side rear pedestal bolt; in won't come out, just leave it loose. 53) Smile, since you were already wearing gloves when the second socket broke, this one on the driver's side rear pedestal bolt. 54) Go get your last 10mm 1/4" drive socket from your third set of tools, and loosen the rear pedestal bolt on the driver's side of the engine, remove it with a small magnet. 55) Cuss again when you find your $ .50 mirror stuck to the magnet in the tool chest. 56) Carefully lift turbo out of truck, place it on work bench, and retrieve o-rings from back of engine block, and place with a/c o-rings for replacement later. 57) Again, from the "Lessons Learned Files", place a rag in the oil holes in the engine block where the turbo was. They look small, but you'd be amazed what can fall in there. 58) Swear to all holy heaven when your step stool (bucket) tips over, and you catch your crotch on the hood latch. 59) You guessed it, two beers. 60) Realize there's no way of pulling the engine today because you need this little frickin tool that uncouples the quick-couple fuel lines, and NAPA is closed. 61) Couple more beers to celebrate as radio announces your football team just won. 62) Damn, it's dinner time already and you worked through lunch. 63) Yell to the Woman to order a pizza. Toppings of your choice. Wash it down with a couple of brews. 64) Unplug the block heater from the left side of the engine, and undo the pyrometer If you have one. 65) Unbolt the starter wires, then unbolt and remove the starter - 3 bolts. 66) Unbolt tranny cover (automatic) - 5 bolts, and remove the 6 nuts that holds the flywheel to the torque converter, not 4 nuts like the Ford manual says. Impact wrench works dandily here as it keeps the flywheel from turning. 67) More cussing is in order after violent collision with your head and the front differential housing. 68) Unbolt the rear engine mounts from under the truck. Left side can be done with an Impact wrench, the right side with a box wrench and pipe. 69) Make mental note that not all Ford engineers are idiots as the engine mount bolts are very short or they would never come out. 70) Remove front engine mount bolts from above, both using the box wrench and pipe. 71) Unbolt the top two tranny to engine bolts using a 3/8" ratchet or box wrench. 72) Support tranny with tranny jack, or angle iron clamped to front springs with block of wood between it and the tranny, then remove 2 bolts 1/2 way up the trans, then the 2 bolts at the bottom of the trans. 73) Don't forget about the ground strap going from the right cylinder head to above the heater box. The Ford manual says to unbolt the strap at the back of the block. Though it's tempting to just unbolt it from the firewall because the back of the head is a pain to get to, they fail to mention that the tranny dipstick is also fastened here, and not removing this bolt will also yank the dipstick tube from the tranny, leaving you with another trip to the Ford parts dept. 74) Then, after NAPA opens tomorrow, buy the fuel line disconnect tool, and go home and try it out, then return that one for the correct one (it's the one that fits two small hoses, not four larger ones), and uncouple the fuel lines by sticking in the tool and pulling on the hose. 75) Cut a piece of plywood the size of the radiator to cover the a/c condenser to prevent damage from a freely swinging engine. 76) Alas, with an assistant and suitable engine hoist, lift engine up and forward to detach it from tranny, then straight up to clear oil pan from cross member, then lift front of engine with the tilting attachment (really a must have) and turn engine hard to the right to basically 90 degrees from where it was, sticking the crankshaft pulley over to the washer fluid tank, and out she comes. 77) Observe empty engine compartment, sharing a few beers with your assistant, and notice the rusted through brake line and power steering line that were leaking, damaged from the removal. 78) Finish off the rest of your beers as you listen to the Women gripe, "Are you sure you can put all that back in the way it should be?"
Happy wrenching.
|