| |
|
|
|
 |
|
www.DzlJim.com |
|
|
Project: Multi-function
switch replacement
In May of 2001, my truck had
an injector die while I was driving it on on sunny Sunday morning. I had the
hazard lights on as I sat on the side of the road waiting for the tow truck.
About every other car that passed me honked, as if they were yelling, " HEY! Get
off the road, ya bum!" Curious, I walked around the truck noticing that only one
of the 4 signal indicators was flashing. Made mental note to self: Fix Hazard
lights.
The fix was delayed due to my not liking to do electrical repairs and/or dash
work, and it bugged me for over a year, till I read a post online how easy it
was to change this switch.
Overview of Project
The turn signals, 4-way hazard
lights, high beams, and windshield wipers are all controlled from a
"multi-function switch" located in the steering column, attached to the turn
signal stalk. Strange things can occur when this switch goes bad, like
loss of one turn signal, loss of several but not all 4-way hazard lights, etc.
I obtained a new multi-function switch from Fordpartsnetwork.com for $58.99
shipped to my door in about 3-4 days. Part # is F8TZ13K359AB and is shown below.
It was almost too easy to replace, only needing to remove the steering wheel, 4
screws holding the covers around the steering column, unplug two connections,
and the 2 screws that hold on the switch.
I have been told
that the steering wheel does NOT need to be removed to replace the switch. I
have not tried this with the wheel still on, but since I had the puller and it
was an easy step to just get the wheel out of the way, I removed it. If you do
not have a steering wheel puller you should be able to replace the mf switch
with the steering wheel in place.
Tools needed
-
15mm socket on a 3/8" drive ratchet.
-
7mm socket on a 1/4" drive ratchet.
-
T-20 Torx screwdriver.
-
Medium sized Phillips screwdriver.
-
2 small flat blade screwdrivers.
-
Steering wheel puller (Though I've heard a
rubber mallet may work, too!)
Removal of the old switch
 |
|
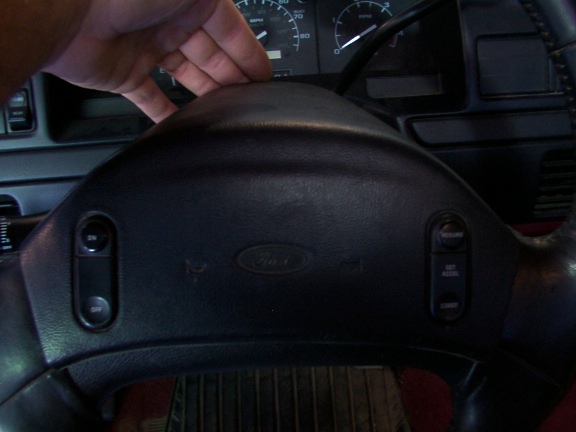
First, you need to remove the cover from the center of
the steering wheel. This is done by simply working your fingers into the
front edge of the top of the cover, and gently pull back toward you. |
|
| |
|
|
|
 |
|
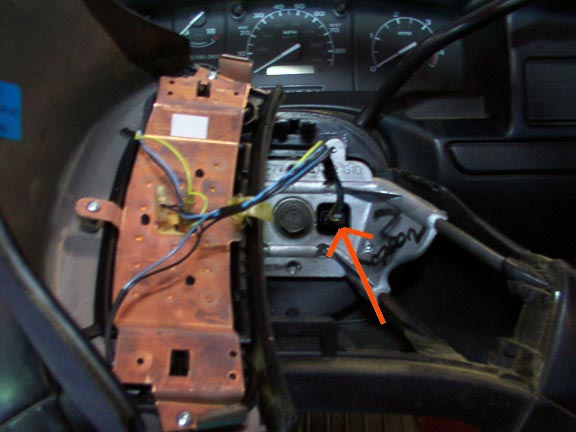
With the cover removed, you need to unclip the plug
holding on the wires for the cruise control, if your truck is so equipped.
The arrow indicates the location of the clip on the plug. |
|
| |
|
|
|
 |
|
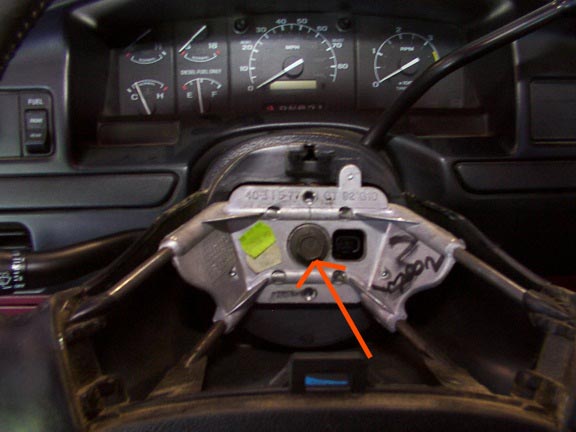
Now you'll need a 15mm socket on a ratchet to loosen the
bolt in the center of the steering wheel. I'd loosen it about 1/2 way, so
the bolt acts as a foot for the steering wheel puller. |
|
| |
|
|
|
 |
|
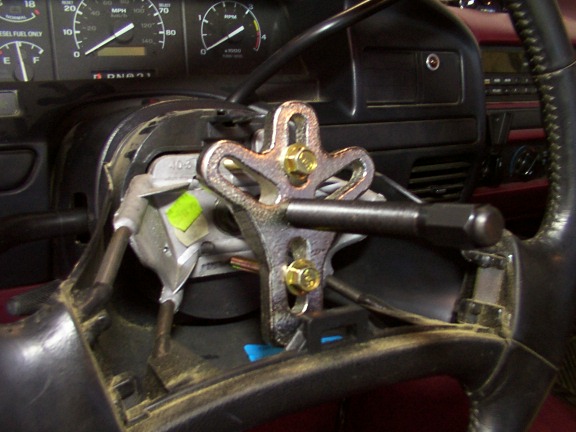
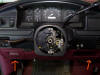
Mark the location of the steering wheel on the steering
column so you'll know where it was when you took it off. This can be
done with a piece of masking tape on each part, or draw a line in the dust
on the column like I did! The grooves on the wheel are widely spaced
so it's pretty easy to get it back on exactly where it was, otherwise the
wheel will be WAY off. Apply the steering wheel puller, and with a few
gentle turns the wheel pops off. |
|
| |
|
|
|
 |
|
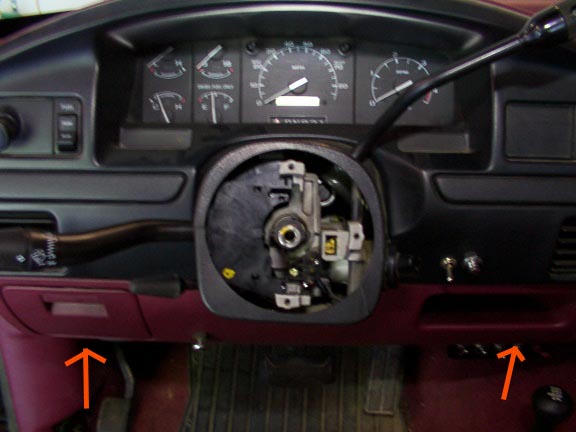
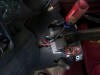
With the wheel off, you need to loosen/remove the top and
bottom covers around the steering column. There is one screw that
necessitates removal of the lower kick panel. The arrows show the
location of the two 7mm screws that hold it on. |
|
| |
|
|
|
 |
|
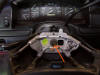
This is a photo of the underside of the steering column,
showing the locations of the 4 Phillips head screws. |
|
| |
|
|
|
 |
|
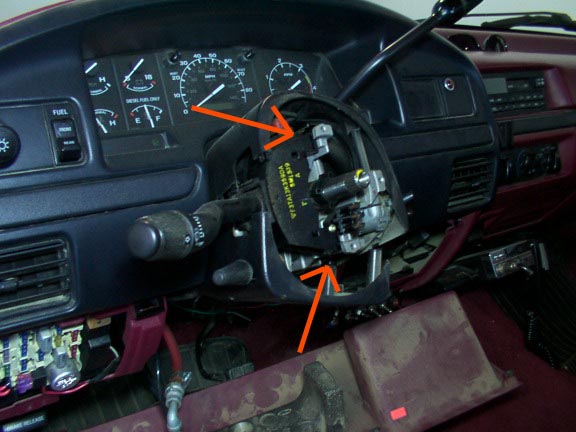
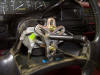
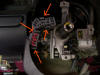
With the covers loose, you can now move and shift them
around to expose the two T-20 Torx head screws that hold the multi-function
switch to the column. |
|
| |
|
|
|
 |
|
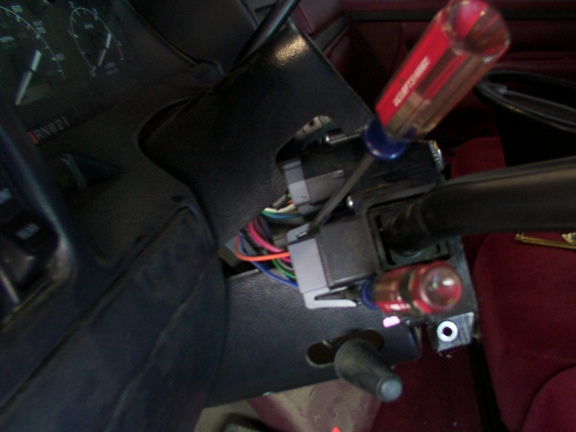
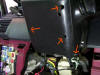
Once the switch is loose, use 2 small screw drivers to
unclip the two plugs on the back side of the switch. Some jockeying
around of the switch may be necessary to access both plugs. |
|
| |
|
|
|
 |
|
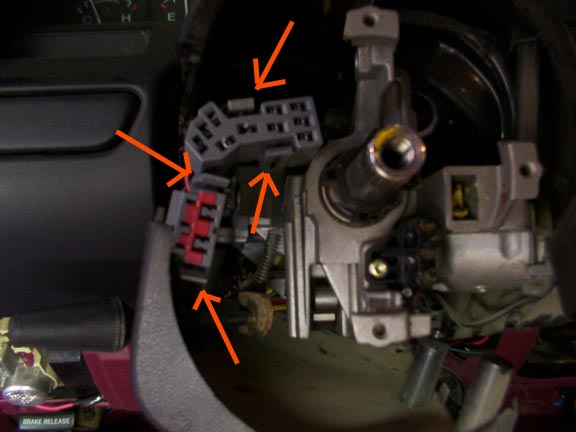
This pic shows the location of the clips on the 2 plugs. |
|
| |
|
|
|
Results
 |
|
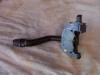
This is the new multi-function switch. The only
noticeable difference between the new and old switches is the old push-pull
switch to activate the Hazard lights was red, whereas the new one is black.
Reverse the removal instructions to install the new switch |
|
| |
|
|
|
Results
I plugged the new switch into
the 2 plugs and tested it to make sure I didn't bugger anything else up while
working in there and all checked out. With everything back in it's place
and all the parts screwed back together, Hazard lights function as good as new!
Happy wrenching.
~
Back
to 'The Black Truck'
~
|
|